Sprite Sheet Maker Workflow That Actually Ships
A sprite sheet maker is useful only when the file it exports survives the rest of production. The deliverable is not a pretty grid of poses. It is a repeatable package: evenly sized frames, stable character proportions, deliberate timing, a PNG atlas, metadata when the engine needs it, and import settings that preserve sharp pixels. The safest workflow starts with one short action, usually idle or run, and carries it all the way through packing and engine playback before the team makes five more animations. AI can help produce a motion reference or explore poses, but it does not replace frame cleanup, pivot control, padding, or an engine test. This guide shows how to move from an animation brief to a sheet you can hand to a developer without creating a late-night repair job.
TL;DR
- Define the frame size, action list, playback rate, pivot, palette, and target engine before drawing or generating frames.
- Finish one loop from source frames to engine playback. Use its settings as the preset for the remaining actions.
- Treat AI motion as source material. Select, redraw, align, and pack the frames in a conventional sprite editor or atlas tool.
- Export the atlas and its data together, then test frame order, edge bleeding, scale, filtering, and loop timing in the actual runtime.
Quick Answer
The workflow that ships is brief, source, clean, pack, import, test. Write a small animation contract first. For example: a 64 by 64 pixel courier, eight run frames, 12 frames per second, bottom-center pivot, indexed palette, transparent PNG, and a Unity or Godot target. Create or collect the frames, then normalize each one to the same canvas and ground line. Pack them as a grid or atlas, export JSON only if the importer uses it, and preview the loop in the target engine. Do not start a full action library until one representative loop passes. If you want a motion reference before drawing, you can animate a sprite frame, extract useful poses, and rebuild those poses as controlled production frames.
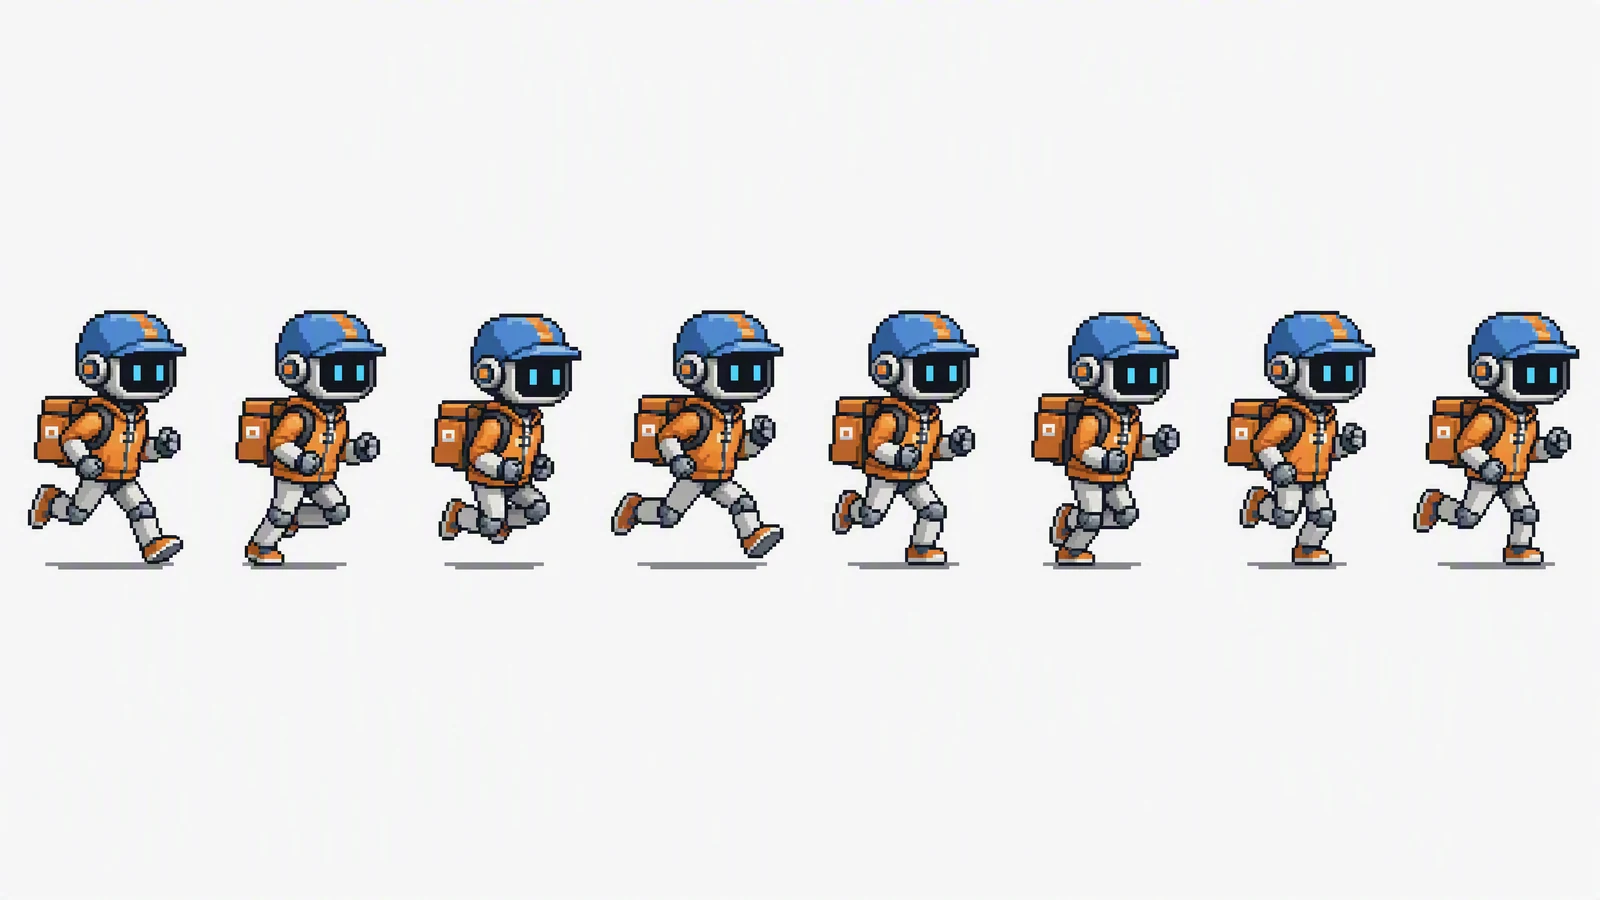
Image prompt: A production-ready pixel art sprite sheet of one original robot courier wearing an orange delivery jacket, blue helmet, and small square backpack, with eight evenly spaced running frames in one horizontal grid. Keep the full body visible, character scale and palette identical, feet aligned to one ground line, crisp pixel edges, and a clean light background.
Define the deliverable before choosing a sprite sheet maker
Teams often begin by comparing tools. That is too early. A browser packer, Aseprite, TexturePacker, an engine importer, and a custom script can all be the right answer under different constraints. The useful question is what the next tool expects.
A production handoff normally contains four parts:
- A source file that keeps editable layers, frames, tags, pivots, and palette information.
- A runtime texture, usually a transparent PNG atlas or a fixed-grid sheet.
- Frame data, such as JSON, only when the runtime or packing layout needs coordinates rather than a known grid.
- An import preset or short settings note that records pixels per unit, filtering, compression, pivot behavior, and playback speed.
Write those four lines at the top of the task. They prevent an artist from optimizing for a GIF preview while the developer waits for a Multiple-sprite texture and a known slice size. They also expose a basic decision: fixed grid or packed atlas.
| Deliverable choice | Use it when | Main risk |
|---|---|---|
| Fixed grid | Every frame uses the same width and height, and the engine can slice by cell size | Empty space increases texture area |
| Packed atlas plus JSON | Frames have different bounds or many actions share one texture | Importer and metadata format must agree |
| Individual PNG sequence | The engine, editor, or build script already creates the atlas | Naming and ordering errors spread easily |
| Animated GIF or video | Review only | It discards the frame package the runtime needs |
For a first implementation, a fixed grid is easier to inspect. You can see a missing frame, a shifted baseline, or a cropped hand without opening metadata. Packed atlases become more attractive when the character library grows and texture space matters.
Choose the source path: authored frames or motion reference
There are two sensible starting points. Packing-first is for frames that already exist. Motion-reference-first is for a team that still needs to discover the movement. They can share the same cleanup, packing, and import stages, but they should not be treated as interchangeable tools.
| Starting state | Recommended path | What the sprite sheet maker does |
|---|---|---|
| Finished hand-drawn frames | Normalize, tag, then pack | Builds the texture and data package |
| Rough sketches with timing | Refine the key poses, add in-betweens, then pack | Preserves the approved sequence |
| One character image with no motion | Create a short motion reference, select poses, redraw, then pack | Receives cleaned frames, not raw video |
| Existing video reference | Extract candidates at fixed times, reduce them to readable poses, then pack | Converts the final frame set into runtime assets |
The combined path works because each tool has one job. Motion generation can suggest weight shifts, arcs, and transition poses. A pixel editor controls the silhouette, palette, frame boundary, and pivot. The packer arranges the approved files. The engine reveals whether the package works.
Review each stage against its own output. A generated clip may look fluid while hiding a different hand shape in every frame. A sprite sheet can look perfectly aligned while using the wrong import filter. Neither surface alone proves that the animation is ready.
Lock a character spec that fits on one screen
Character consistency is easier when the spec is short enough to check repeatedly. For the courier in this guide, the anchor is deliberately plain: orange jacket, blue helmet, square backpack, dark face screen, gray limbs, and cyan eyes. The silhouette, color roles, light direction, and ground contact matter more than tiny decorative details.
Create a one-page anchor with:
- Front, side, and three-quarter views.
- A fixed palette with named color roles rather than loose sampled colors.
- The standing height in pixels and the amount of clear space above and below it.
- One ground line and one default pivot.
- Details that must remain, plus details that may simplify during fast action.
If the source frames come from an AI-assisted pass, compare every candidate against this anchor. The character consistency guide is useful before you create motion because it focuses attention on identity anchors, camera stability, and reference discipline. The same idea applies at sprite scale: a backpack that changes width is not a small cosmetic error when it makes the run cycle pulse.
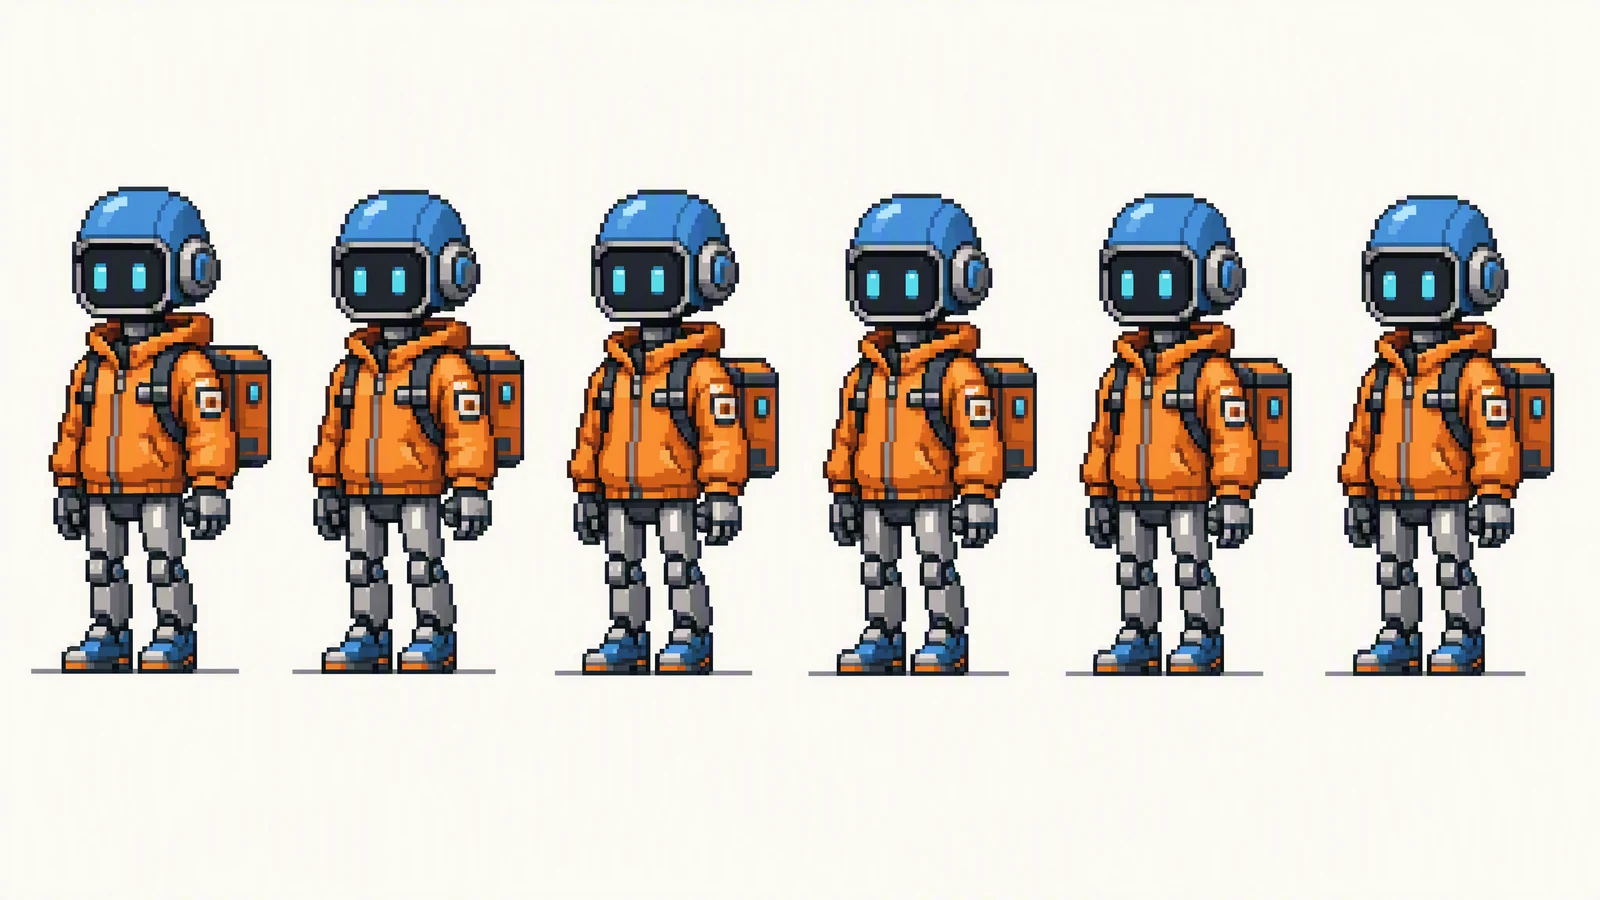
Image prompt: A production-ready pixel art sprite sheet of the same original robot courier in an orange jacket, blue helmet, and square backpack, with six idle-breathing frames in one horizontal grid. Use subtle shoulder and backpack movement, a stable face and eye shape, identical canvas size, one ground line, crisp pixel edges, and a clean light background.
The idle sheet is a good consistency test because the movement is small. If the helmet, shoulder width, or backpack changes between these frames, the problem will be even more visible in a faster action. Fix the anchor before adding motion.
Plan actions and timing as a small contract
Do not ask for "all the animations." List the states the game or interface can actually enter. A courier prototype might need idle, run, jump, package throw, damage, and recovery. Death, climb, wall slide, and emotes can wait until the core controller exists.
For each state, write an animation contract:
| Field | Run example | Why it matters |
|---|---|---|
| Canvas | 96 by 96 pixels | Every frame slices the same way |
| Frames | 8 | The action has a fixed review scope |
| Playback | 12 fps | Timing is tested consistently |
| Loop | Yes | First and last poses must connect |
| Pivot | Bottom center | Feet stay planted in the engine |
| Travel | In place | Game code controls world movement |
| Palette | Courier v1 | Color drift becomes a review failure |
| Export tag | courier_run |
Packer and importer use one name |
Frame count should follow the action. Idle may need six restrained poses. A jump often benefits from separate crouch, takeoff, ascent, apex, descent, contact, and recovery poses. A throw needs readable anticipation and follow-through. Giving every state eight frames only creates filler.
Thumbnail the extremes before filling gaps. At small sizes, the silhouette must explain the action without facial detail. If the jump apex looks like another running pose, adding more in-betweens will not rescue it.
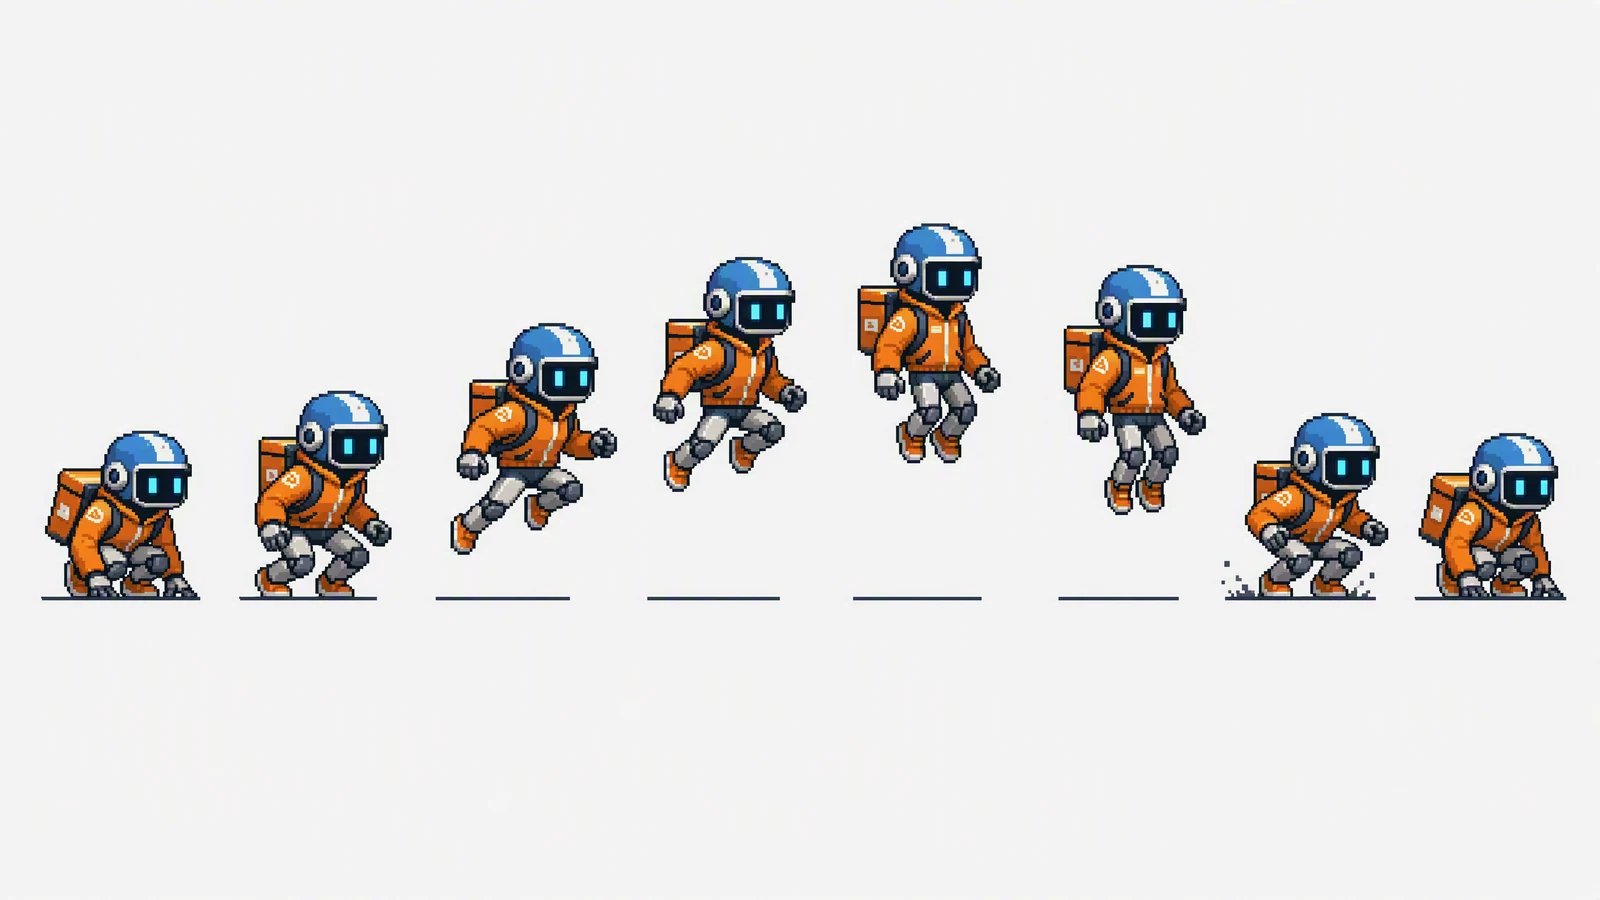
Image prompt: A production-ready pixel art sprite sheet of the same original robot courier completing an eight-frame jump from crouch through takeoff and apex to landing. Arrange the poses in one horizontal grid, keep the orange jacket, blue helmet, square backpack, scale, palette, and light direction stable, show the full body, and use crisp pixel edges on a clean light background.
This sheet communicates the action arc clearly, but a production editor would still place every pose on equal cells and set the pivot independently. The visible ground references help review contact frames; they are not a substitute for pivot data.
Build frames that can survive cleanup
Authored frames should remain layered until the action is approved. Keep the body, head, backpack, held object, shadows, and effects separable when changes are likely. Flatten only the runtime export.
For AI-assisted source material, work from a controlled shot. Use a static camera, plain background, readable full-body framing, and one action. A five-second clip with one clean jump is more useful than a dramatic camera move with three actions. If a still prompt is enough to explore poses, use it for pose design. If timing and weight are the question, generate a motion test from a prompt and extract candidate moments at regular intervals.
Then edit. Pick the few frames that explain the motion. Redraw broken hands and props. Reapply the palette. Put each figure on the same canvas. Align the pivot before evaluating the loop. Editing turns a loose reference into controlled production frames.
Use ordered names from the beginning:
courier_run_01.png
courier_run_02.png
courier_run_03.png
...
courier_run_08.png
Zero-padding matters once a sequence reaches double digits. It prevents lexical sorting from placing frame 10 before frame 2. Keep action names and case consistent as well; build scripts are less forgiving than a Finder window.
Clean silhouette, baseline, palette, and prop arcs
Review the action in four passes instead of trying to notice everything at once.
The silhouette pass checks whether the action reads at 100 percent scale and at the in-game scale. Hide interior detail or view a single-color version. If the pose loses its meaning, separate the arms, legs, prop, or torso angle more clearly.
The baseline pass overlays frames and watches the planted foot, hips, and head. Intentional vertical motion is fine. Accidental one-pixel bouncing is not. Use onion skinning and a fixed pivot marker. Do not align by the top of the helmet because the head should be allowed to move.
The palette pass looks for stray colors, soft resampling, and inconsistent outlines. Pixel art should be resized with nearest-neighbor scaling for review and presentation. Repeated scaling with smooth filters will blur hard edges and create colors that were never in the palette.
The prop pass follows the package, sword, tool, or effect through the action. Plot the arc mentally. Props that jump between hands or change size are more distracting than a small body wobble because the eye follows them.
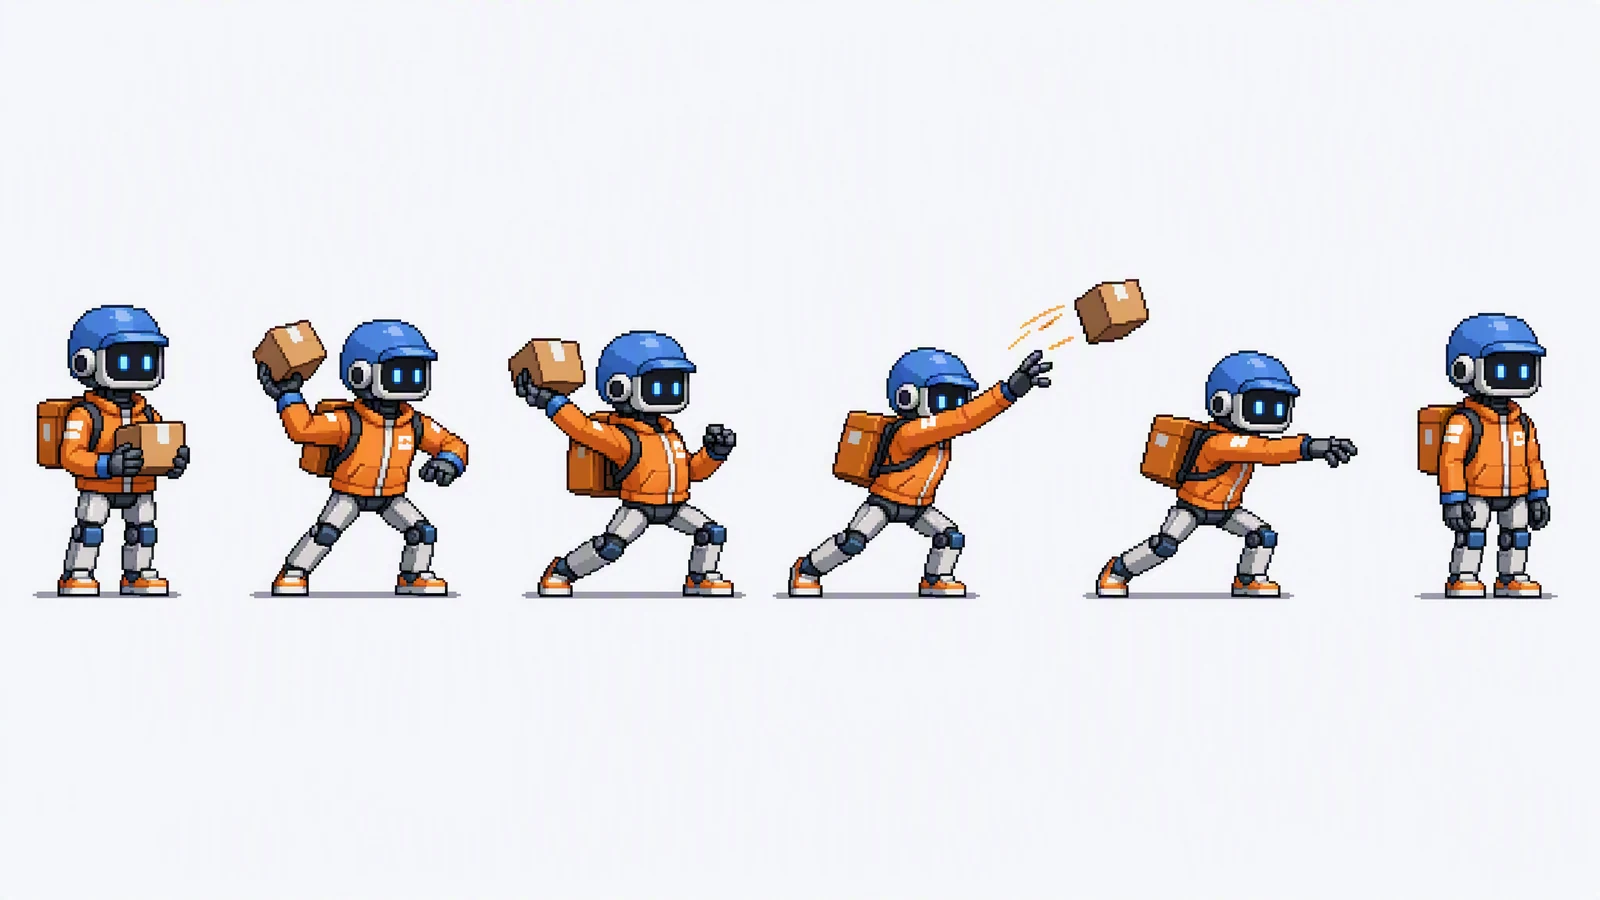
Image prompt: A production-ready pixel art sprite sheet of the same original robot courier performing a six-frame package throw. Show a clear wind-up, release, and follow-through in one horizontal grid. Keep the orange jacket, blue helmet, square backpack, character scale, palette, and frame size consistent, with complete poses and crisp pixel edges on a clean light background.
The throw is where prop review pays off. Track the package center from frame to frame, then check the hand after release. The arm should continue the motion instead of snapping back to idle immediately.
Pack one approved action before packing the library
Once the frames are clean, export an approved sequence and build the first atlas. Aseprite can export sprite sheets and JSON data, including rows, columns, horizontal, vertical, or packed layouts. Other packers can combine multiple actions and emit engine-specific data. The layout should follow the importer, not personal preference.
Use these packing settings as a starting checklist:
- Keep the source canvas identical for fixed-grid sheets.
- Add enough separation or edge extrusion to prevent neighboring colors from bleeding when the texture is sampled.
- Preserve alpha in the PNG.
- Disable trimming when the runtime assumes equal cells or when a stable pivot is easier to maintain with the full canvas.
- If trimming is enabled, export pivot and source-size data and confirm the importer reads it.
- Name animation tags and files exactly once, then reuse those names in code.
- Export the texture and metadata in the same operation so they cannot drift apart.
Power-of-two atlas dimensions may still fit some pipelines and compression paths well, but they are not a universal rule to apply blindly. Check the target engine, renderer, and platform. The more reliable rule is to keep the atlas within the platform's texture limits and test the actual import.
Version the source file, exported texture, and metadata together. If only the PNG changes while the JSON remains old, the animation may display the wrong rectangle even though both files look valid on their own.
Use SeedVideo AI for a focused motion check
An image-to-video pass can help when a pose feels stiff or the team disagrees about timing. Export one clean anchor frame, upload that frame, describe one restrained action, and use the output as movement reference. The Seedance 2.5 image-to-video workflow explains how to keep a source image visually important while defining motion in the prompt.
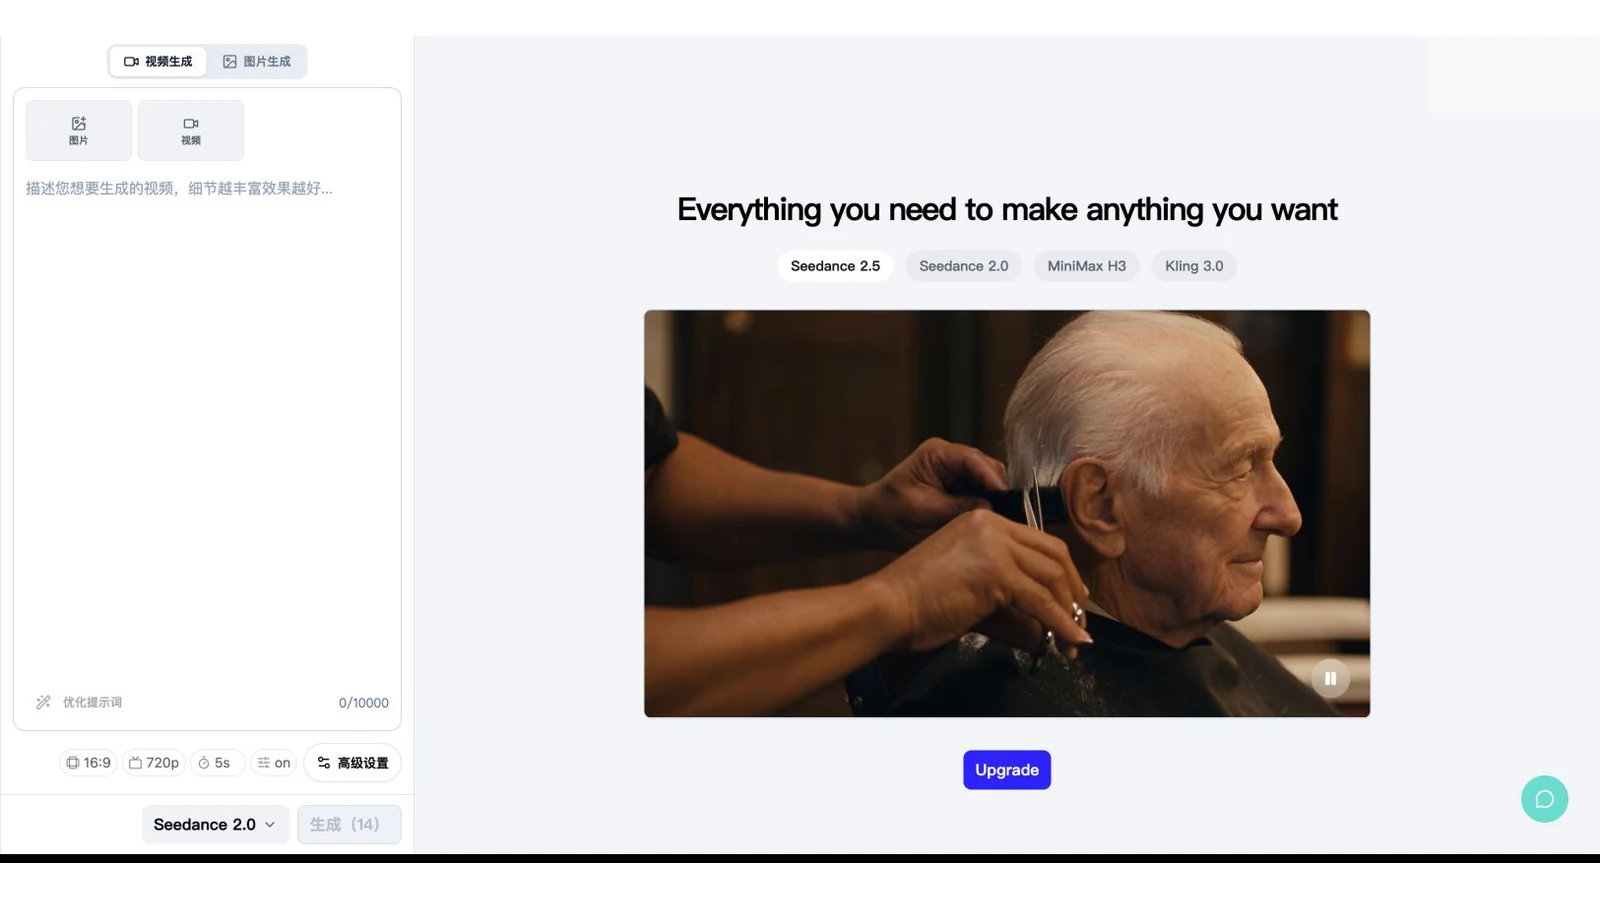
SeedVideo AI Image to Video interface captured on August 10, 2026, showing image and video inputs and generation controls.
The current interface exposes image and video input controls, a prompt field, aspect ratio, resolution, duration, sound, advanced settings, and model selection. To test a sprite pose, open the AI image-to-video generator, add a single clean frame, and describe the smallest useful action. Keep the camera fixed and the background quiet. Ask for one readable motion rather than a scene change.
A suitable motion note might be:
The robot courier shifts weight onto the back foot, raises the package with the right hand, throws it forward in one clean arc, and settles into a balanced recovery pose. Static side camera, full body always visible, stable pixel-art proportions, no zoom, no camera pan.
Try this prompt in SeedVideo AI
Use the clip to study anticipation, spacing, and recovery. Then redraw the selected poses in the pixel editor. A video output is not the atlas and should not determine frame boundaries automatically. The sprite contract still controls frame count, cell size, palette, pivot, and loop behavior.
New users can check the current free-credit and plan rules on Seedance pricing before running motion references. Credit use depends on the model and selected settings, so scope the motion question before generating.
Import into the target engine and test the real failure modes
A packer preview catches layout problems. Only an engine import proves that the files and settings work together. Import one action into the real project, attach it to the character controller or a minimal test scene, and view it at gameplay scale.
For Unity, the texture normally needs a Sprite texture type. A sheet with multiple cells uses Multiple mode and is sliced in the Sprite Editor or through supported importer data. Pixel art commonly needs Point filtering and no compression that softens the edge. Set pixels per unit to match the project's world scale, not a number copied from another project.
For Godot, AnimatedSprite2D uses a SpriteFrames resource and can work with individual images or a sprite sheet. Define the horizontal and vertical frame counts correctly, add the frames to the named animation, and set the playback speed and loop state from the contract.
Whatever the engine, test these conditions:
- The first and last frames loop without a hitch.
- The pivot remains stable while the body moves.
- Neighboring cells do not bleed at the target camera scale.
- The texture remains crisp under the project's filtering and scaling rules.
- Frame order matches the intended timing.
- The action changes cleanly to and from idle.
- The build on target hardware matches the editor preview.
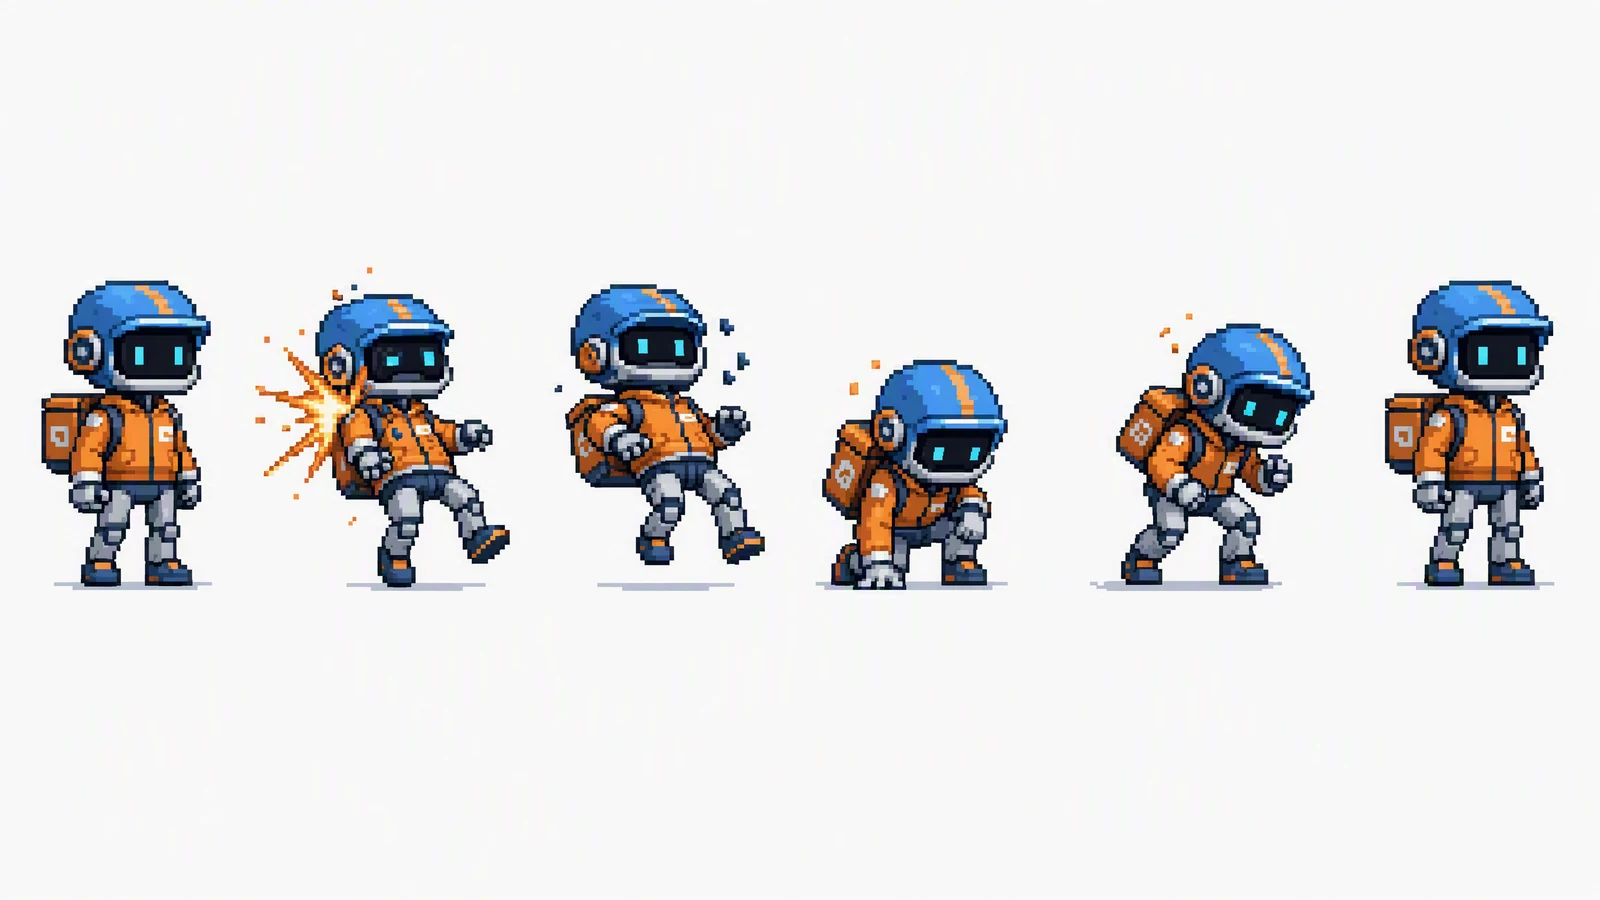
Image prompt: A production-ready pixel art sprite sheet of the same original robot courier showing six coherent damage-and-recovery frames. Arrange impact, recoil, low recovery, and a stable return pose in one horizontal grid. Preserve the orange jacket, blue helmet, square backpack, scale, palette, and hard pixel edges on a clean light background.
Damage animations reveal transition problems quickly. The controller must know when movement is locked, when control returns, and whether the last recovery frame can blend or switch into idle. If those rules are missing, even a clean sheet can feel unresponsive.
Diagnose problems by stage
Late fixes are expensive when the team edits the wrong source. Classify the symptom before touching pixels.
| Symptom | Most likely stage | Practical fix |
|---|---|---|
| Character pulses in size | Source or cleanup | Reapply the character anchor and normalize scale |
| Feet jitter while running in place | Alignment or pivot | Overlay frames and lock the bottom-center pivot |
| Colors appear around cell edges | Packing or sampling | Add padding or extrusion and review filtering |
| Image looks blurry | Import settings | Use the correct pixel-art filter and compression settings |
| Wrong frame plays | Naming, metadata, or slice order | Compare file order, exported coordinates, and engine animation list |
| Loop pauses briefly | Timing or duplicate endpoint frame | Inspect the final-to-first transition and per-frame duration |
| Package changes shape | Source consistency | Redraw the prop from a fixed model sheet |
| Sheet previews well but breaks in build | Platform import or texture limit | Test the built target and inspect platform overrides |
Avoid repairing a bad atlas with gameplay code. Runtime offsets can hide one pivot error, but they become a second animation system that the team must maintain. Fix the earliest incorrect stage, regenerate the downstream files, and rerun the same import test.
A sprite sheet maker checklist for handoff
Use this list on the first action and again before release.
Animation contract
- Target engine and platform are named.
- Canvas size, frame count, playback speed, loop behavior, pivot, and travel mode are recorded.
- Character anchor and palette are approved.
- Action naming matches code and export tags.
Frame review
- Every frame is complete and fits inside its canvas.
- The baseline and pivot are consistent.
- The silhouette reads at gameplay scale.
- Props follow a coherent arc and keep their shape.
- The first-to-last transition has been previewed.
Export and packing
- Runtime PNG preserves transparency.
- Grid size or metadata matches the actual frame bounds.
- Padding, extrusion, and trimming choices match the importer.
- Texture and data files were exported together.
- Source, atlas, and metadata use the same version.
Engine validation
- The sheet is tested in the real project, not only the packer.
- Filtering, compression, scale, and platform overrides are checked.
- Transitions to and from idle work.
- The built target matches the editor.
- One approved preset is saved for the next action.
When a sprite sheet is the wrong format
Sprite sheets are strong for short 2D actions, deterministic playback, simple runtime control, and compact art direction. They are less comfortable when the animation needs many angles, continuous skeletal variation, large frame dimensions, or constant procedural changes. A bone-based 2D rig may be better for characters that need equipment swaps and blended poses. A video or shader may be better for a large one-off effect. A texture array may suit a renderer that already treats frames as separate layers.
Choose based on runtime behavior. Do not force a packed atlas into a pipeline that benefits from another representation just because the first prototype used PNGs.
Ship one loop, then scale the workflow
The dependable sprite sheet maker workflow is intentionally unglamorous. Define the contract. Finish one action. Clean the frames. Pack the texture and data together. Import it with deliberate settings. Test it in the build. Only then duplicate the preset for idle, jump, throw, damage, and the rest of the library.
AI motion references can shorten the pose-discovery stage, especially when the team has a clear character anchor and one small movement question. They do not remove the need for pixel editing or engine validation. If your starting point is a character still, use the Seedance 2.5 image-to-video workflow to study motion, then return to the sprite contract and build the frames the runtime expects.