How to Make Product Demo Videos with Seedance AI (2026 Guide)
A useful product demo shows one feature working and connects it to a result the buyer cares about. With Seedance AI, the strongest workflow starts with real product evidence: a clean product photograph, a genuine interface capture, or both. Animate physical products with restrained camera moves. Keep software interactions as real screen recordings or lightly animated screenshots so buttons, labels, and states stay readable. Then edit those proof shots into short versions for your landing page, store listing, and social channels. This approach is more reliable than asking one long prompt to invent an entire demo. It also makes review easier because every shot has one job. Before generating anything, decide what the viewer must understand by the end and which real visual can prove it.
TL;DR
- Pick one feature and one user outcome before you write a script.
- Use real UI captures for software and clean product images for physical goods.
- Generate short proof shots, then assemble the full story in an editor.
- Keep labels, logos, colors, hands, and product geometry on a strict review list.
- Export separate landing-page, marketplace, and vertical-social cuts.
Quick Answer
To make a product demo video with Seedance, build a five-shot plan: context, input, feature action, result, and next step. Prepare a high-resolution source image or real UI capture, then open the AI image-to-video generator. Give each generated shot one visible action and one camera instruction. Preserve exact product shape and color, keep important text as an editing-layer overlay, and review every frame before combining the clips. For a first Seedance 2.5 test, use 720p and 5 seconds. Crop the input before uploading; first-frame generation uses adaptive framing from that image.
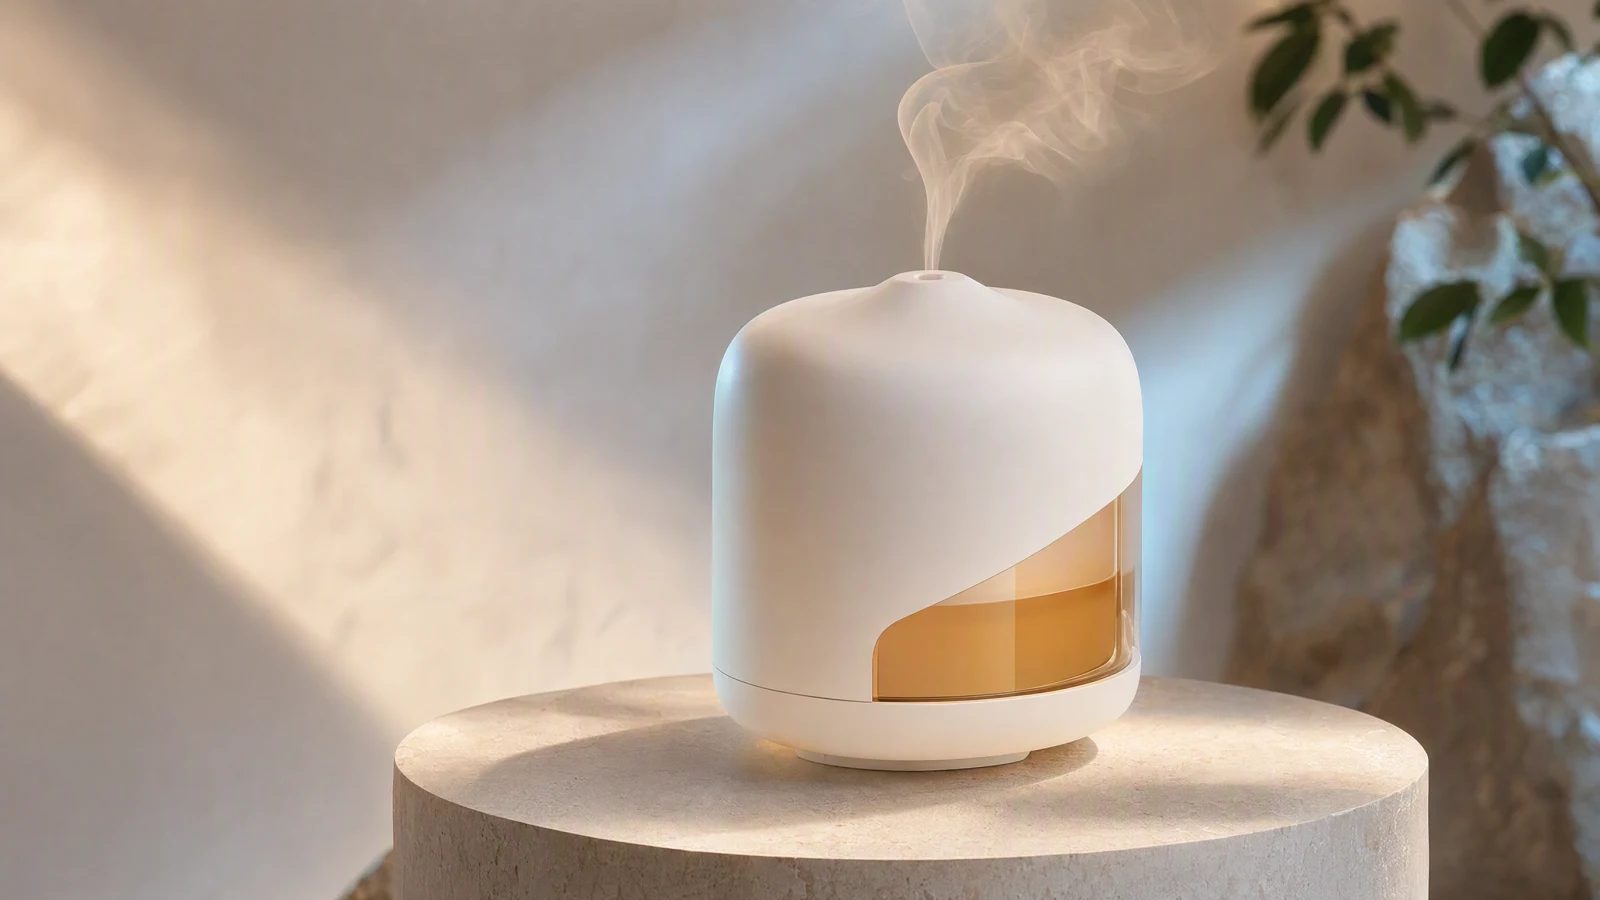
Video prompt: Slow three-quarter orbit around an original matte-white smart aroma diffuser with a translucent amber reservoir on a pale stone pedestal, a soft ribbon of mist curling upward, warm side light and cool rim light revealing the materials, stable product geometry, premium commercial product photography, shallow depth of field, clean negative space, 16:9.
What a product demo needs to prove
A product demo is different from a broad brand ad. An ad can sell a mood. A demo has to make a feature understandable. A software viewer should see where an action begins, what changes on screen, and why the change matters. A physical-product viewer should see the product's form, the relevant mechanism or material, and the result of using it.
Use this sentence to define the video before production:
For [specific user], this video shows how [one feature] produces [one observable result] in [one situation].
Try this prompt in SeedVideo AI
For a project-management app, that might be: "For a team lead, this video shows how turning a message into an assigned task keeps a launch request from getting lost." For a travel bottle, it might be: "For a commuter, this video shows how the locking cap prevents a leak inside a packed bag."
If the sentence contains several audiences, features, or outcomes, split the idea. A concise demo can still have several shots, but all of them should support the same proof. This keeps the edit clear and reduces the temptation to ask the model for unrelated actions in one clip.
Demo, explainer, or commercial?
| Format | Main question | Best evidence | Typical edit |
|---|---|---|---|
| Product demo | How does this feature work? | Real UI, product detail, visible state change | Direct and instructional |
| Explainer | Why does this problem happen, and what is the approach? | Diagram, narration, product context | More conceptual |
| Commercial | Why should I feel interested in this product? | Lifestyle scene, hero shot, brand mood | Fast and emotional |
The formats can share footage, but the priority changes. If your goal is a feature walkthrough, keep the product proof in the center. The AI product video generator workflow is useful when you need more advertising-oriented shot ideas. This guide stays focused on demonstrations that a buyer can follow.
Plan one feature and one outcome
Write the outcome first. "Show the dashboard" is not an outcome. "Find the delayed shipment in three seconds" is. "Show the shoe" is not enough either. "Reveal the breathable mesh and cushioned heel during a slow orbit" gives the shot a visible purpose.
Turn that outcome into a compact shot table before opening the generator:
| Shot | Purpose | Source | Motion | Keep exact |
|---|---|---|---|---|
| 1. Context | Establish the user's situation | Real environment or original scene | Slow push in | Product category and setting |
| 2. Input | Show the starting state | Product photo or real UI | Minimal move | Layout, silhouette, colors |
| 3. Feature | Demonstrate one action | Close-up or screen capture | One clear action | Labels, controls, mechanism |
| 4. Result | Show the changed state | Real result or controlled scene | Hold, reveal, or pull back | Result data and product identity |
| 5. Next step | Tell the viewer what to do | Product end frame | Nearly static | CTA text added in the editor |
A shot can run for only a few seconds and still communicate its point. The editor, not a single generation, should control the total 15, 30, or 60-second sequence. Short clips are easier to regenerate, compare, trim, and replace.
Prepare source material that survives motion
For a physical product, choose a source image with clear edges, enough resolution, and a readable three-quarter angle. Keep the background simple. Reflective packaging, narrow straps, transparent pieces, and tiny printed labels deserve extra attention because motion can expose small shape changes.
For software, capture the real product at the exact state the viewer needs. Hide customer data, test accounts, notifications, balances, browser extensions, and unrelated tabs. Use a realistic demo account with believable but non-sensitive content. Capture one state before the action and another after it. Those two frames give the editor reliable evidence even if you use generated motion between them.
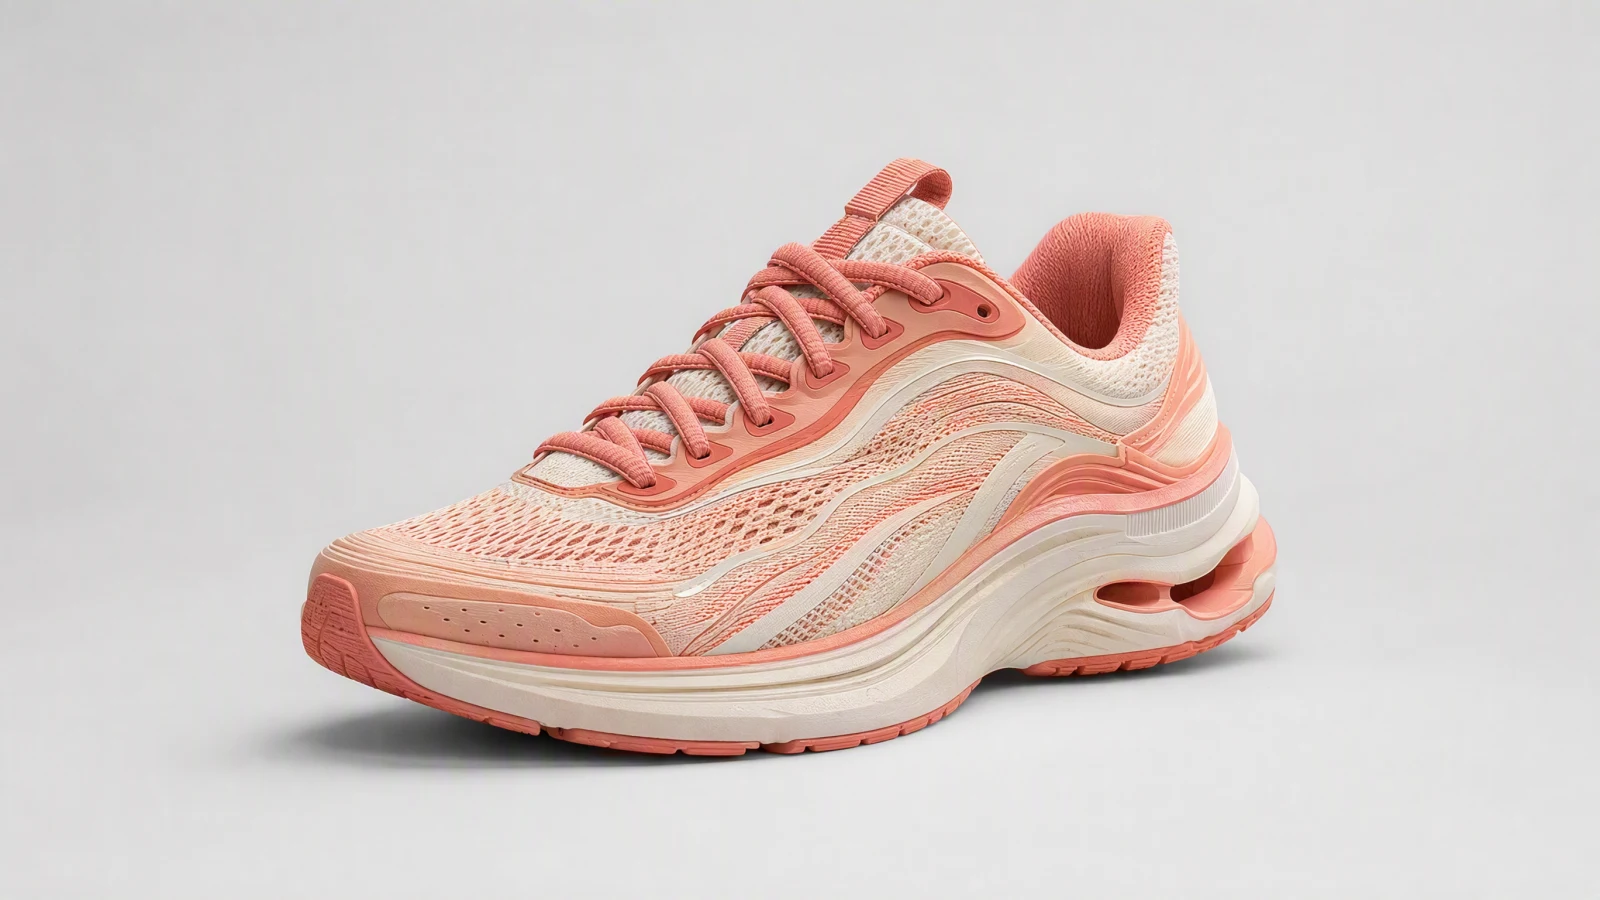
Video prompt: Begin with a stable front three-quarter view of an original coral and cream running shoe on a seamless light-gray studio sweep, perform a slow controlled clockwise orbit of about 25 degrees, preserve every mesh panel, lace path, sole layer, color, and proportion, soft diffused studio light, restrained shadow, crisp commercial product photography, 16:9.
Running-shoe example: recorded generation
This September 8 test used the source image and prompt above with Seedance 2.5 through EvoLink. There was one attempt, with no retry. The request was 720p, 5 seconds, one start image, and audio off. The downloaded file is 1280 × 720 H.264 MP4, 5.04 seconds at 24 fps.
The sampled frames show a turn from a front three-quarter view toward the side. The coral and cream palette and shoe outline remain recognizable. Check the laces and sole details at full size before using the result in a product claim. This is a generated studio example, not a recording of a physical product.
Submission to saved output took 221.6 seconds, including queueing, polling, and download. The provider reserved 87.5 EvoLink credits. That reservation is an estimate in the provider's billing units; it is not the SeedVideo AI customer charge or a verified final debit. The run record includes the exact prompt, task ID, timestamps, input and output hashes. Check the current account quote in the generator for web pricing.
For more detail on source selection and motion control, use the Seedance 2.5 image-to-video workflow guide. Its frame-by-frame checks also apply to product demos.
Set up the current SeedVideo AI workspace
Open the SeedVideo AI image-to-video workspace with Seedance 2.5 selected. Click the shared attachment button. One image becomes the start frame; two become the first and last frames in attachment order. Three or more images, or a video input, use reference mode. After sign-in, check the selected mode and credit estimate in the workspace before submitting. The September 8 configuration supports 4 to 30 seconds and up to 1080p on eligible plans. Lite is limited to 720p, and free signup credits do not unlock Seedance 2.5.
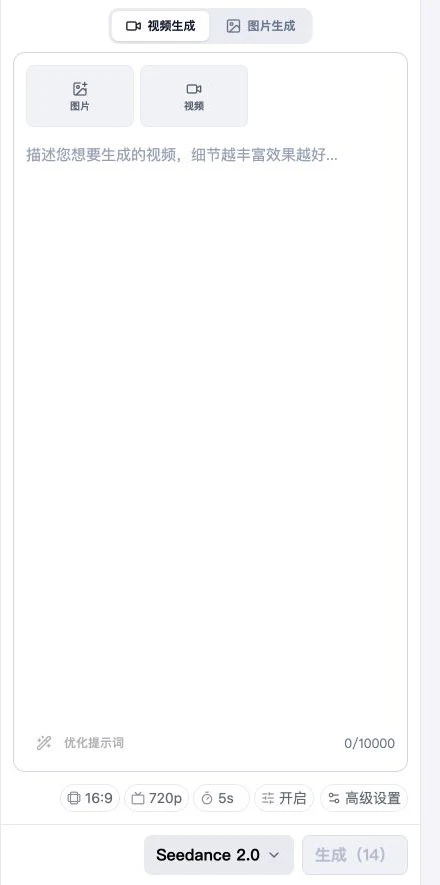
Historical workspace screenshot from August 20, 2026. The current attachment behavior and limits are described above; the screenshot is not a live view of the controls.
Check the current estimate rather than copying values from the historical screenshot. Credit cost depends on the selected model, duration, resolution, and settings. The pricing page currently says new users receive signup credits without a credit card, while commercial-use terms vary by plan. Check the current pricing and checkout language before publishing paid client or advertising work.
Choose the model by shot, not by habit
Both Seedance 2.0 and Seedance 2.5 appear in the current model picker. The interface describes Seedance 2.0 as supporting image, text, and reference-based video, while Seedance 2.5 is presented as multimodal control with audio. Do not turn that menu copy into a quality promise. Match the model to the source and shot, generate a small comparison when your budget allows, and keep the take that preserves the evidence the demo needs.
Compare the label, product edge, feature action, and ending frame in each take. Reject a shot that changes the product, even if the camera movement looks convincing.
Write prompts for proof shots
A product demo prompt works best when it gives the model a narrow assignment. Put the fixed product facts before the motion. Then state one action, one camera move, the lighting, and the ending condition.
Use this structure:
[Exact subject and fixed traits].
[One product or user action].
[One camera move and framing].
[Lighting and environment].
[Ending frame and elements that must remain unchanged].
Try this prompt in SeedVideo AI
Physical product reveal
An original matte-white smart aroma diffuser with a translucent amber reservoir,
unchanged silhouette and materials. A soft ribbon of mist begins and continues
steadily. The camera performs a slow three-quarter orbit while staying at product
height. Warm side light and a cool rim light reveal the surface. End on a stable
front three-quarter frame with clean space on the left.
Try this prompt in SeedVideo AI
Feature close-up
An unlabeled frosted-glass skincare pump with exact bottle, cap, and pump geometry.
One clear serum droplet forms and falls into a glass dish. Locked macro camera with
a very slow push forward. Soft white overhead diffusion and a narrow warm rim light.
Keep the product color, shape, and transparent materials stable through the last frame.
Try this prompt in SeedVideo AI
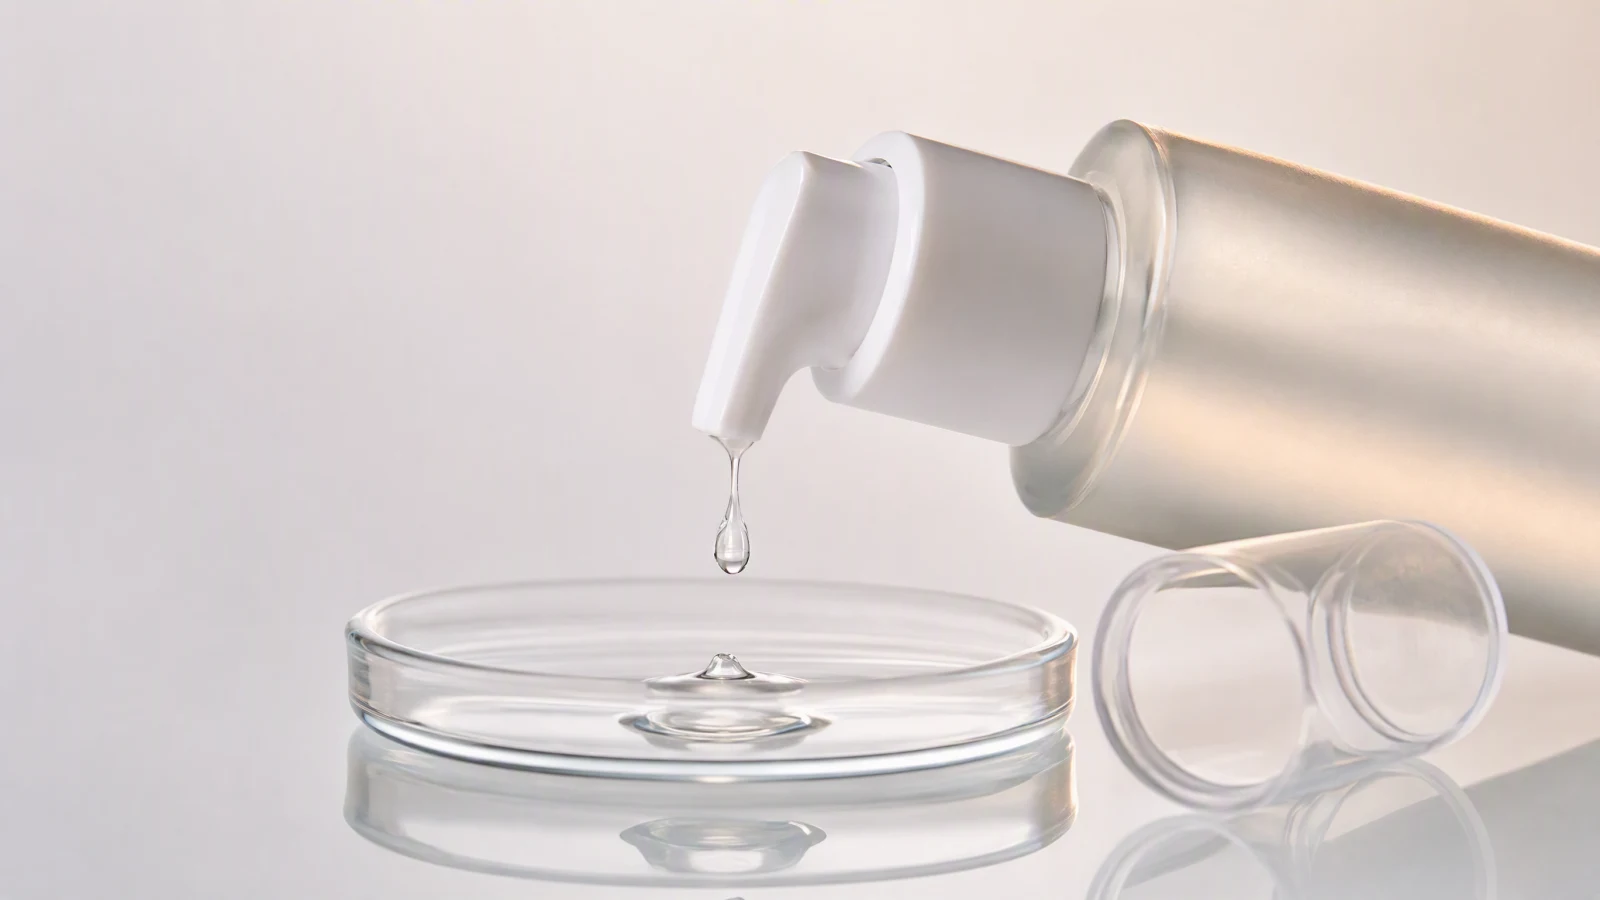
Video prompt: Locked macro shot of an original unlabeled frosted-glass skincare pump dispensing one clear serum droplet into a glass dish, exact bottle silhouette and pump geometry preserved, very slow camera push forward, soft white overhead diffusion, narrow warm rim light, realistic liquid refraction, stable clean ending frame, 16:9.
Serum-pump example: recorded generation
This September 8 test used the source image and prompt above with Seedance 2.5 through EvoLink. There was one attempt, with no retry. The request was 720p, 5 seconds, one start image, and audio off. The downloaded file is 1280 × 720 H.264 MP4, 5.04 seconds at 24 fps.
The sampled frames show a droplet reaching the dish, followed by liquid ripples and a slow camera push. The bottle and pump remain recognizable. Check the tighter ending crop against the space needed for any caption. This is a generated studio example, not a recording of a physical product.
Submission to saved output took 176.4 seconds, including queueing, polling, and download. The provider reserved 87.5 EvoLink credits. That reservation is an estimate in the provider's billing units; it is not the SeedVideo AI customer charge or a verified final debit. The run record includes the exact prompt, task ID, timestamps, input and output hashes. Check the current account quote in the generator for web pricing.
Software feature shot
For software, ask for restrained camera motion around a real capture rather than invented clicks. A gentle push toward a highlighted area can work. The actual cursor movement, button press, data change, and text should come from a real screen recording whenever accuracy matters.
Use the supplied product screen as the exact visual reference. Preserve every label,
number, card position, and color. Add only a slow two-second camera push toward the
selected task card, then hold. Keep the interface sharp and readable. End on the
unchanged source screen with room for an editor-added callout.
Try this prompt in SeedVideo AI
This division of labor is deliberate. Generated motion supplies polish. Real screen capture supplies proof.
Combine image-to-video and real screen recordings
Physical products often benefit from image-to-video shots because the source photograph anchors the object's appearance. Software benefits from a hybrid edit:
- Start with a short contextual scene or device shot.
- Cut to a real screen recording for the actual interaction.
- Use a controlled image-to-video shot for a transition, close-up, or ending frame.
- Add typography, cursor emphasis, and narration in the editor.
This method keeps UI copy readable and still gives the sequence visual movement. It also lets you update one interface step without regenerating the entire video when the product changes.
If you need a more brand-led ending or lifestyle shot, the Seedance commercial video guide covers product photography, shot planning, and platform-ready edits. Keep the demonstration portion intact before adding that layer.
Review product consistency frame by frame
Watch the clip once for meaning, then again for defects. Pause at the beginning, middle, and end. Scrub through fast motion one frame at a time. Review on a large screen before approving a mobile crop.
| Check | What to inspect | Fix path |
|---|---|---|
| Shape | Edges, holes, straps, caps, buttons, ports | Reduce motion or use a cleaner source angle |
| Color | Product finish, packaging, brand palette | Simplify lighting and specify fixed color |
| Text | Labels, prices, UI copy, numbers | Replace with editor-added text or real screen capture |
| Hands | Finger count, grip, contact point | Shorten the action or show the mechanism without a hand |
| Motion | Camera direction, product movement, background stability | Give one movement instruction per shot |
| Ending | Last frame, CTA space, edit point | Add a hold and specify the final composition |
Do not approve a clip just because the first frame looks good. Product demos fail most visibly when an edge changes halfway through, a label drifts, or the result screen no longer matches the claimed action.
Fix the prompt before adding more words
When a take fails, identify the first visible error. If the shoe sole changes during an orbit, reduce the orbit. If a pump turns into a different cap, lock the camera and shorten the action. If interface text blurs, move the interaction to a real screen recording. A longer prompt cannot compensate for an overloaded shot.
Build three channel-specific edits
One master sequence rarely fits every placement. Keep the same product proof, then change pacing, framing, captions, and CTA.
| Version | Suggested structure | Framing priority | CTA treatment |
|---|---|---|---|
| Landing page | 6 to 15-second loop or 20 to 30-second click-to-play demo | Product and result visible without scrolling | Quiet end frame or nearby page button |
| Store or marketplace | Feature first, then close-up and result | Product centered, labels readable | Match the listing's allowed format |
| Vertical social | Hook in the opening second, proof immediately after | 9:16 safe zones and large captions | Short spoken or on-screen action |
For a landing-page loop, design the first and last frames to connect cleanly. For a marketplace, confirm the platform's current media rules before export. For vertical social, rebuild the crop instead of placing a wide clip inside a small frame.
Audio deserves its own pass. A product demo can work muted if the visual proof is clear, but narration can explain a state change that is hard to see. Keep sound effects tied to visible actions. Add captions for spoken information and test the final video with audio off.
FAQ
Can Seedance make a complete product demo in one prompt?
It can create short clips, but a reliable product demo is better assembled from separate shots. Each shot can preserve one feature and one action. The editor then controls sequence, captions, narration, and the final CTA.
Should I use Seedance 2.0 or Seedance 2.5?
Both appear in the current SeedVideo AI model picker. Choose by testing the exact source and shot you need. Prefer the take that protects product shape, readable evidence, and the ending frame. Current model availability and credit cost can change.
How should I demo a SaaS product?
Use real screen recordings for clicks, text, and state changes. Use image-to-video motion for controlled transitions, device context, or a lightly animated still. This keeps the demonstration accurate while giving the edit more visual range.
How do I keep logos and labels readable?
Keep critical typography out of moving generated areas when possible. Add labels, prices, legal text, and CTAs as overlays in the editor. If the real label must stay visible, use a short locked shot and inspect every frame.
What source image works best for a physical product?
Use a sharp, well-lit image with clean edges, a simple background, and enough space for the intended camera move. A front three-quarter view usually reveals shape and depth without hiding important surfaces.
Can I use the video commercially?
Commercial rights depend on the current plan and checkout terms. The current pricing page includes commercial use with Pro, Premium, yearly subscriptions, and one-time credit packs, while Lite monthly has different terms. Confirm the current language for your account and client use before release.
Source verified September 8, 2026: the current pricing page states no commercial use for Lite monthly and commercial use for Pro and Premium monthly, yearly subscriptions, and one-time credit packs.
What should I export for a landing page?
Use a short, compressed web video with a stable poster frame, captions where needed, and a clear result visible early. Test loading, autoplay behavior, muted playback, mobile crop, and the CTA on the actual page.
Make the first proof shot
Choose the feature that closes the most buyer doubt. Prepare one clean source image or real UI state, write one narrow motion prompt, and create a short proof shot in the SeedVideo AI image-to-video generator. Once that shot survives frame-by-frame review, build the rest of the demo around it.