A print-ready T-shirt file is a transparent PNG in sRGB, big enough for the print area at the platform's DPI, with clean edges and no stray semi-transparent pixels. For a standard Merch on Demand shirt that means 4500 × 5400 px at 300 DPI; Printful's large front print area of 15 × 18 inches needs at least 2250 × 2700 px at its 150 DPI minimum; Redbubble asks for at least 3873 × 4814 px for men's graphic tees. If your design started as a small AI image or a scan on paper, you need two steps, upscaling and background removal, and the order matters more than most guides admit. In our test, upscaling a transparent PNG brought the original paper background straight back, while upscaling first and removing the background second gave a clean cut-out. We checked the file guidelines of five print-on-demand platforms on November 3, 2026, and ran both orders on a real design with the AI image upscaler and the AI background remover. Here is the workflow that works, the sizes each platform needs, and how to check the edges before you upload.
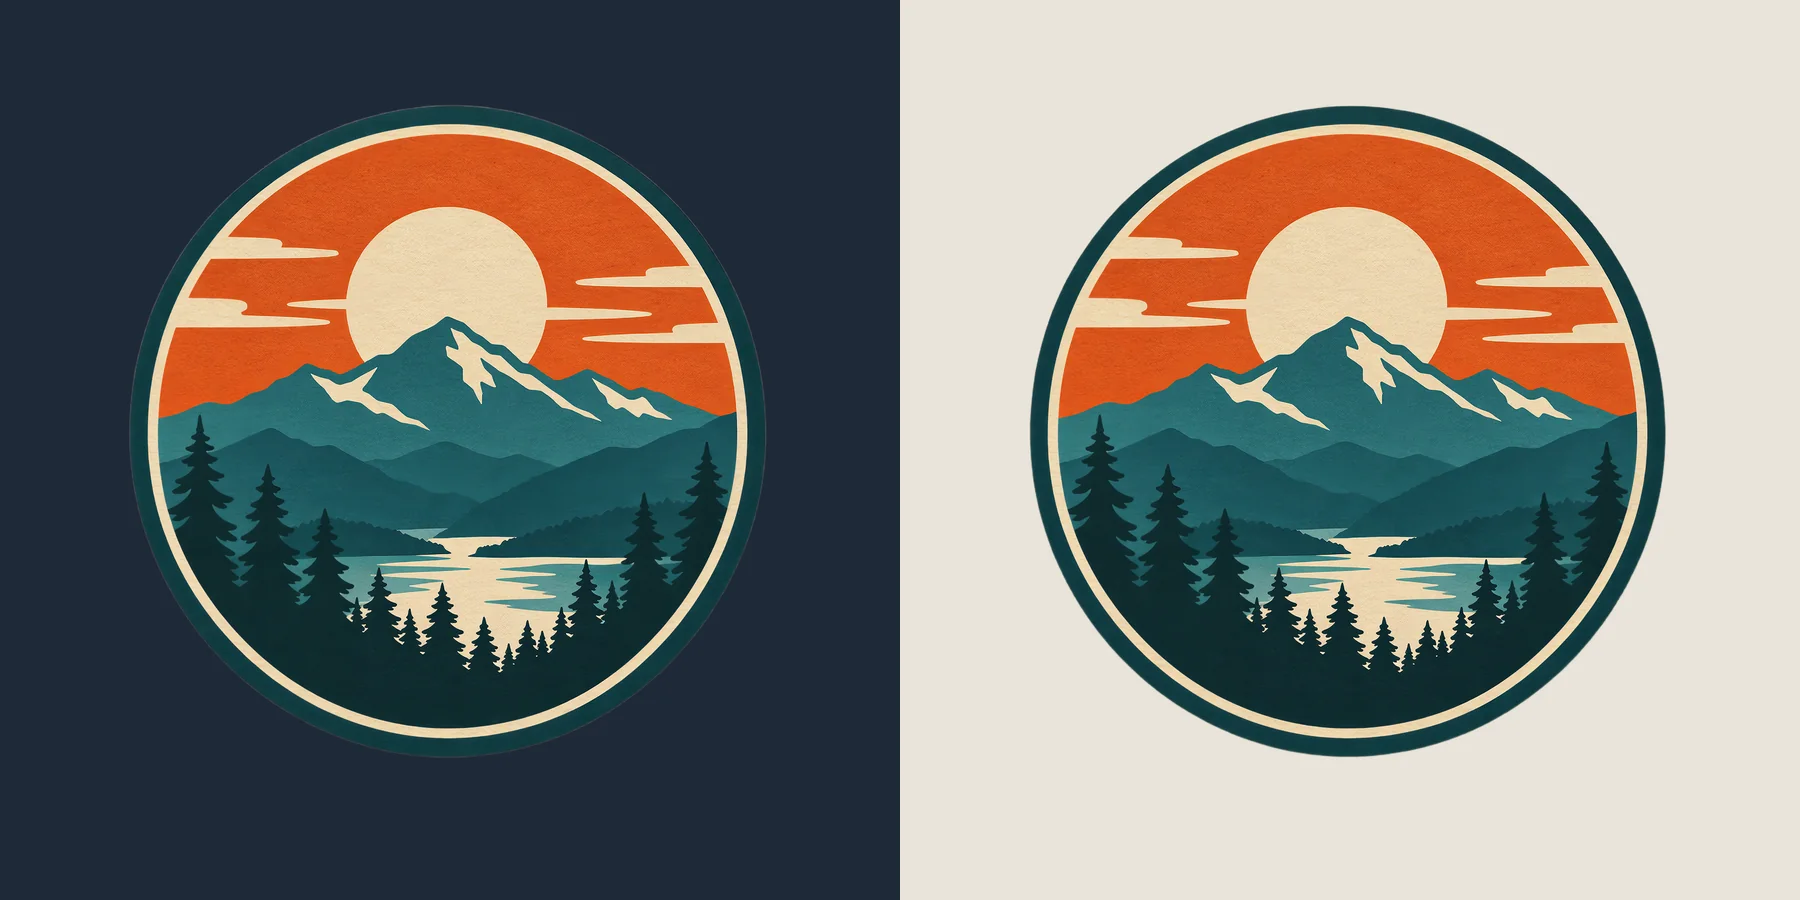
The finished transparent PNG from our test, checked on a dark and a light garment colour.
Quick Answer
- Start from the cleanest copy of the design, ideally on a plain background.
- Upscale first, for example 4× with the image upscaler.
- Then remove the background with the background remover set to Auto, and download the transparent PNG.
- Check the edges at 400% on black and on white, delete stray specks, and place the design on the platform's canvas in sRGB.
TL;DR
- Merch on Demand: transparent PNG, sRGB, 300 DPI, 4500 × 5400 px for a standard T-shirt, 25 MB max.
- Printful: PNG, at least 150 DPI, sRGB; 15 × 18 in front print area from size L means 2250 × 2700 px at 150 DPI.
- Redbubble: PNG for transparency, at least 3873 × 4814 px for men's graphic tees, up to 13,500 px and 300 MB.
- Upscaling a cut-out PNG lost its transparency in our test and the paper background reappeared. Upscale before you remove the background.
- Printful and Printify warn against semi-transparent edges and gradients on DTG prints; check edges on a dark background.
Print-on-demand file requirements (2026)
Last verified: November 3, 2026, on each platform's official guidelines (sources at the end).
| Platform | File | Standard T-shirt size | Colour | Max file |
|---|---|---|---|---|
| Merch on Demand (Amazon) | Transparent PNG, 300 DPI | 4500 × 5400 px front and back; hoodie front 4500 × 4050 px | sRGB | 25 MB |
| Printful (Bella+Canvas 3001, DTG) | PNG or JPEG, at least 150 DPI | Print area 11.5 × 13.8 in (XS–M), 15 × 18 in (L and up): 2250 × 2700 px at 150 DPI, 4500 × 5400 px at 300 DPI | sRGB | 200 MB, 20,000 × 20,000 px |
| Printify | JPEG, PNG or SVG; 300 DPI recommended, 120–150 DPI for large products | Shown per product in the Product Creator | Design in RGB; CMYK is converted and may shift | 100 MB (SVG 20 MB) |
| Redbubble | JPEG or PNG; PNG keeps transparency | At least 3873 × 4814 px (men's graphic tees), 2875 × 3900 px (premium tees) | Design in CMYK, convert to RGB before upload | 300 MB, 13,500 × 13,500 px |
| TeePublic | PNG with transparent background, 150 or 300 DPI | At least 1500 × 1995 px not counting transparent margins; 5000 × 5500 px enables all products | Upload in RGB | Not stated |
The Printful pixel sizes are our arithmetic from its print area and DPI. The rule for any platform is the same: pixels = inches × DPI. A 12-inch-wide chest print at 300 DPI needs 3600 px across; at 150 DPI it needs 1800 px.
Why the order matters: upscale first, then remove the background
Our design was a 1024 × 1024 px mountain badge on beige paper, the size many AI image generators export. We tried both orders.
- Order A, cut out then upscale: the background remover produced a clean transparent PNG at 1024 px. Upscaling it 4× returned a 4096 × 4096 image with no transparency at all, and the beige paper was back.
- Order B, upscale then cut out: upscaling the original 4× took 16.2 s; removing the background from the large version gave a clean transparent PNG with only about 1% partially transparent pixels, all of them along the outline.
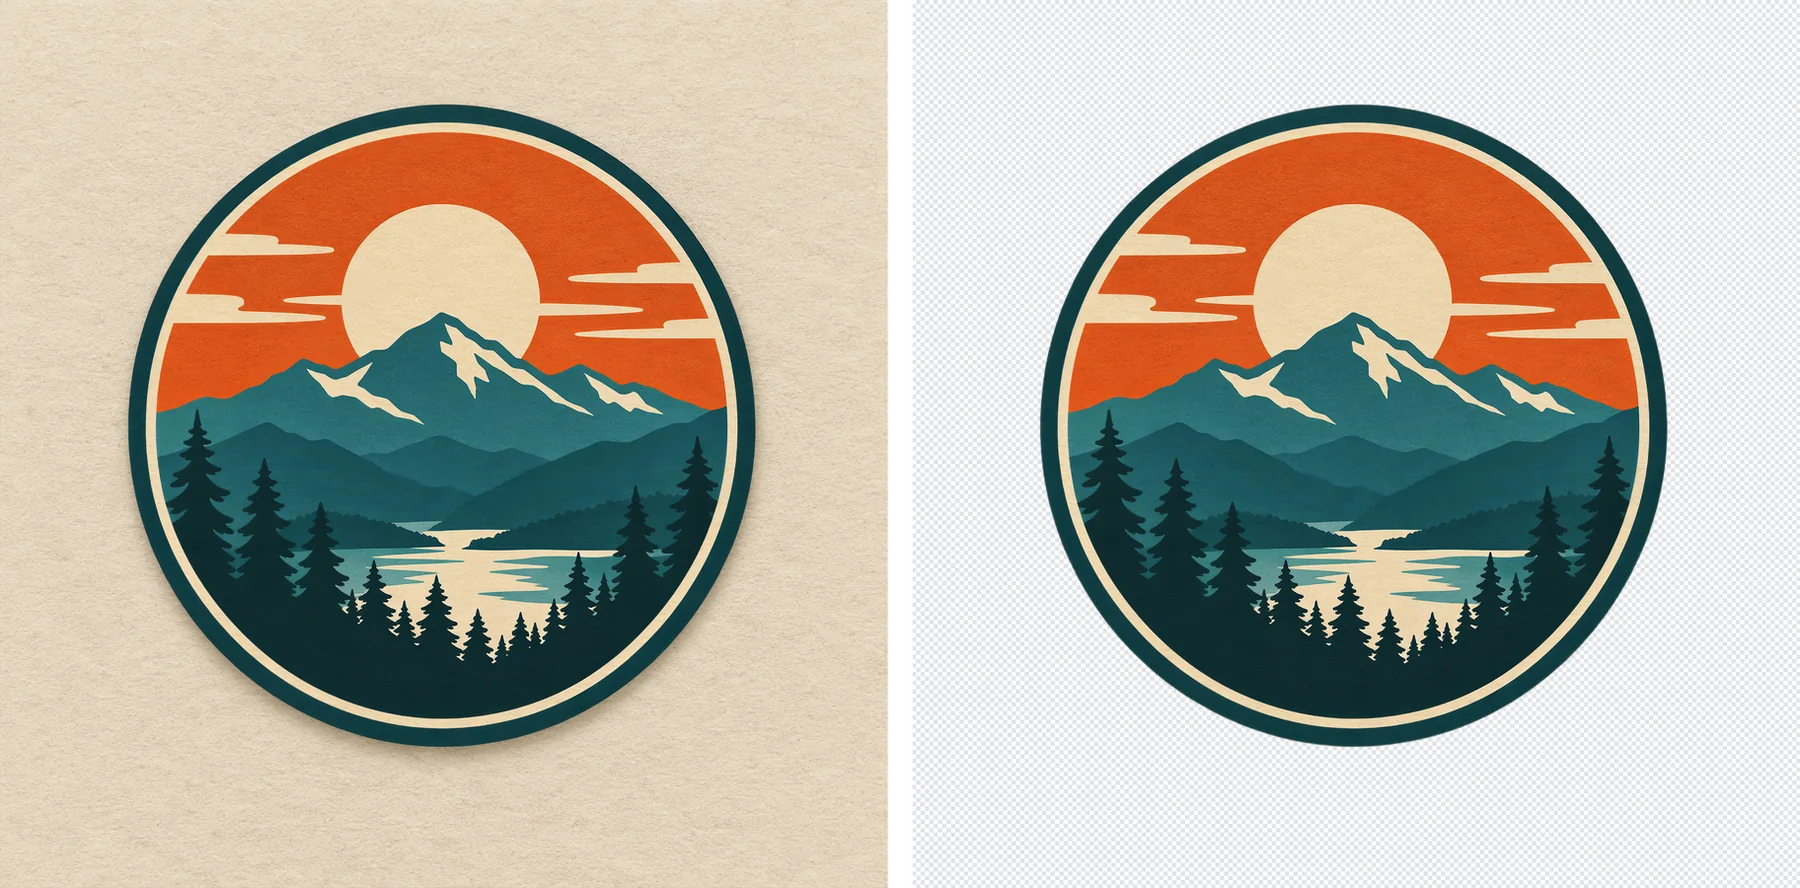
Left: cut out, then upscaled; the paper background came back. Right: upscaled, then cut out; clean transparency.
The reason is how cut-out PNGs are stored. A transparent pixel often still carries the colour that used to be there; only its alpha value says "invisible". An upscaler that works on colour and returns an opaque image shows those colours again. Removing the background last avoids the problem entirely.
Our workflow on SeedVideo AI, with real limits
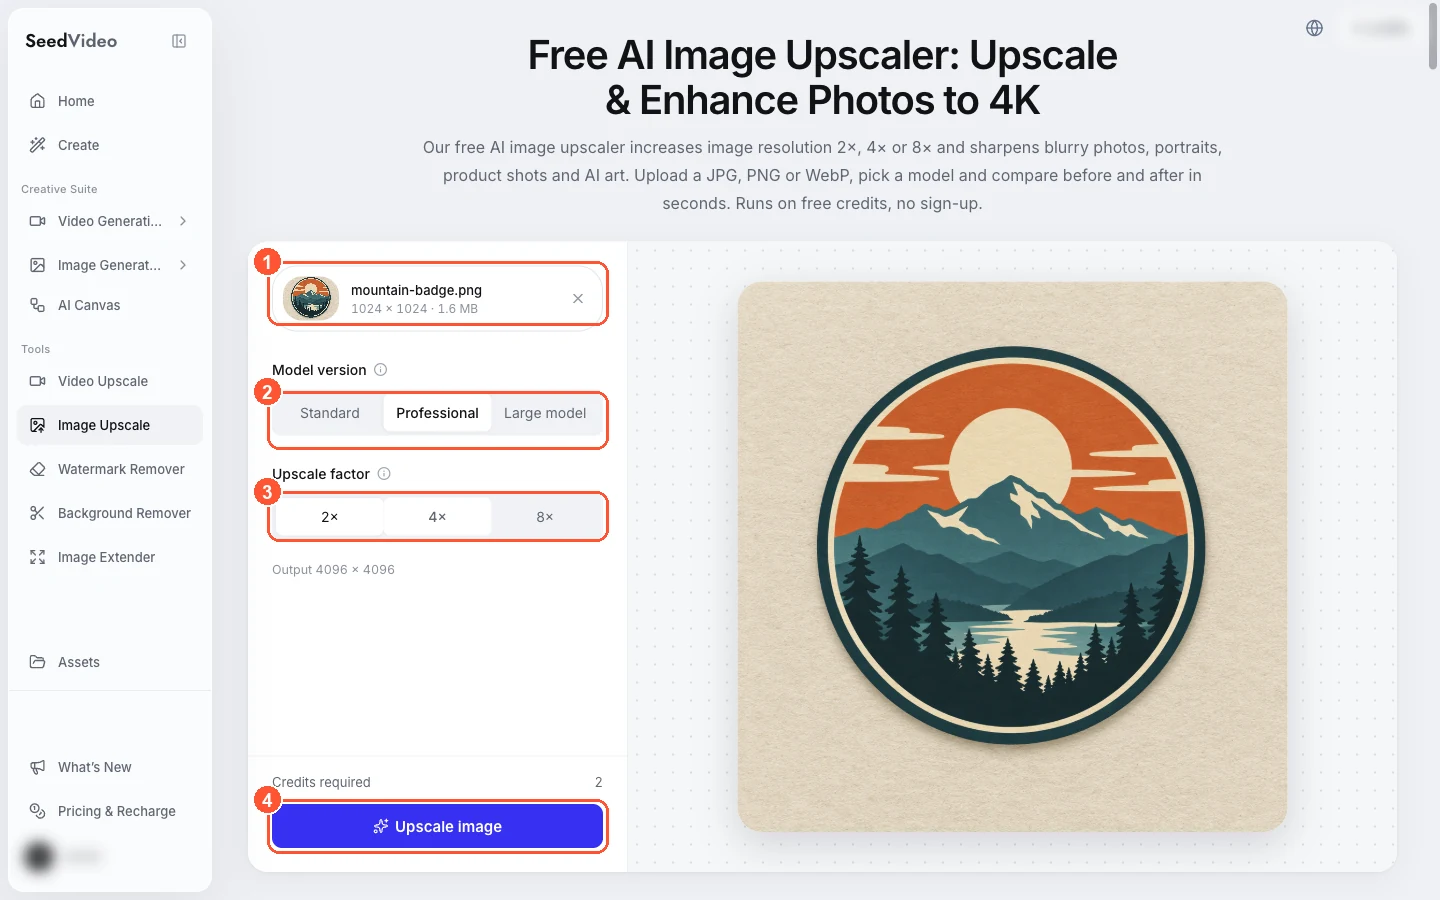
The image upscaler workspace: 1 the uploaded design, 2 the model version, 3 the upscale factor, 4 the Upscale image button.
- Upscale. In the AI image upscaler, choose 2×, 4× or 8× and a model version (Standard, Professional or Large model). Our 1024 px badge became 4096 × 4096 at 4× on Professional, for 2 credits.
- Remove the background. Upload the upscaled image to the AI background remover with Auto selected. Its soft paper shadow was removed along with the background, which is what you want: soft shadows print as a grey haze on DTG.
- Know the size ceiling. The background remover processes images up to 2560 px on the long side and scales larger uploads down first, so the transparent PNG you download is at most 2560 px.
What a 2560 px transparent PNG covers:
| Target | Pixels needed | Fits a 2560 px design? |
|---|---|---|
| Printful front, 15 in wide at 150 DPI | 2250 px wide | Yes, at about 170 DPI |
| Chest print, 8.5 in wide at 300 DPI | 2550 px wide | Yes |
| Merch on Demand full 15 × 18 in at 300 DPI | 4500 × 5400 px | Only as a smaller design placed on the 4500 × 5400 canvas, about 8.5 in wide |
| Redbubble men's graphic tee minimum | 3873 × 4814 px | No, not at full print size |
So the workflow suits Printful and Printify shirts, stickers (Redbubble recommends 2800 × 2800 px for all sticker sizes, so 2560 px is close but under) and chest or pocket prints on Merch. For full-size Merch or Redbubble prints, you need a cut-out larger than 2560 px.
Check the edges before you upload
Edges are where print files fail. Printful advises avoiding semi-transparent edges and fades on DTG and DTF prints and zooming in to find leftover pixels; Printify notes that transparent gradients on dark garments let the white underbase show through; Amazon warns that elements close to the shirt colour can print with a halo and a hard edge.
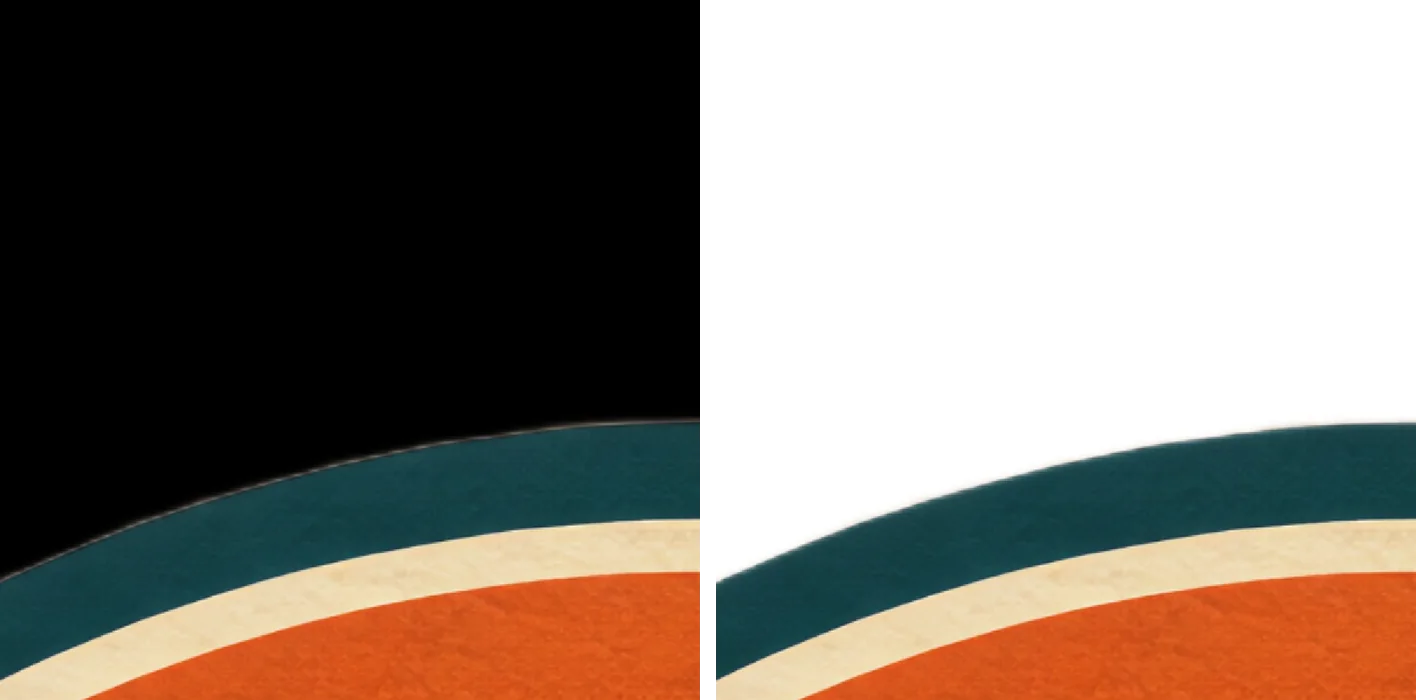
400% edge check on black and white: no light fringe on black and no dark fringe on white.
- View the PNG on black and on white at 400%. A light fringe on black or a dark fringe on white means leftover background pixels.
- Look for stray specks outside the design. Printful notes that for stickers, stray pixels outside the outline get printed and cut.
- Avoid soft shadows and glows unless you halftone them; semi-transparent pixels print unpredictably.
- Trim empty transparent margins. Merch recommends it, and TeePublic's uploader trims them anyway, which can shrink your usable size.
- Keep sticker pieces apart. Printful asks for at least 0.25 in between pieces that should be cut separately.
Rights: logos, characters and watermarks
Print platforms police intellectual property closely. Merch on Demand's content policy bans designs that use trademarks, copyrighted work or other people's names or likenesses without the right to use them, and Printify does not allow brand names or logos on branded blanks. Only print artwork you made or have licensed, and never remove a watermark from a design you found online to print it.
Turn the design into a product video
Once the PNG is ready, a short clip of the design on a garment helps the listing. The AI image-to-video generator can animate a mock-up photo, and our AI product video guide covers prompts for apparel. For example:
A navy cotton t-shirt with a circular retro mountain sunset badge printed on the chest, hanging on a wooden hanger against a warm off-white wall, a gentle breeze moving the fabric, soft natural window light, slow push-in, realistic product video.
More image fixes are collected in our quality fixes guides.
FAQ
What size PNG do I need for a T-shirt design?
It depends on the platform: 4500 × 5400 px at 300 DPI for Merch on Demand, at least 2250 × 2700 px for Printful's 15 × 18 in front area at 150 DPI, and at least 3873 × 4814 px for Redbubble's men's graphic tees.
Should I upscale before or after removing the background?
Before. In our test, upscaling a transparent PNG returned an opaque image with the original background back, while upscaling first and cutting out second kept clean transparency.
What DPI should a print file be?
300 DPI is the safe default and Merch's requirement; Printful accepts 150 DPI or more, and Printify suggests 120–150 DPI only for large products. DPI matters only together with print size: pixels = inches × DPI.
Why does my design have a white halo on dark shirts?
Leftover light background pixels or semi-transparent edges. Check the PNG on black at 400%, remove the fringe, and avoid soft edges on dark garments.
Should a print file be RGB or CMYK?
Upload in RGB. Merch and Printful ask for sRGB; Redbubble suggests designing in CMYK and converting to RGB before upload, and Printify converts CMYK uploads to RGB, which can shift colours.
Can I use AI to remove the background from a logo?
Technically yes, but only print logos you own or are licensed to use. Merch on Demand and Printify both prohibit using other brands' trademarks.
Make your print file now
Enlarge the design with the AI image upscaler, then cut it out with the AI background remover and download a transparent PNG. Your first background removal is free, no sign-up needed.
Sources (checked November 3, 2026): Merch on Demand artwork templates, Merch on Demand best practices, Merch on Demand content policies, Printful Bella+Canvas 3001 file guidelines, Printful file preparation, Printify file requirements, Printify DTG gradients, Printify branded blanks, Redbubble image size guide, TeePublic transparent pixels.